
Friday, October 21, 2011
Tuesday, October 18, 2011
Alternative photo processes and transfers
I am so thankful that the weather is starting to change to cooler temperatures. It means that I can start the darkroom up again. I love just going in there and closing the door and turning the red light on. I took stock today of what needed to be ordered for developing and processing. Can't wait.
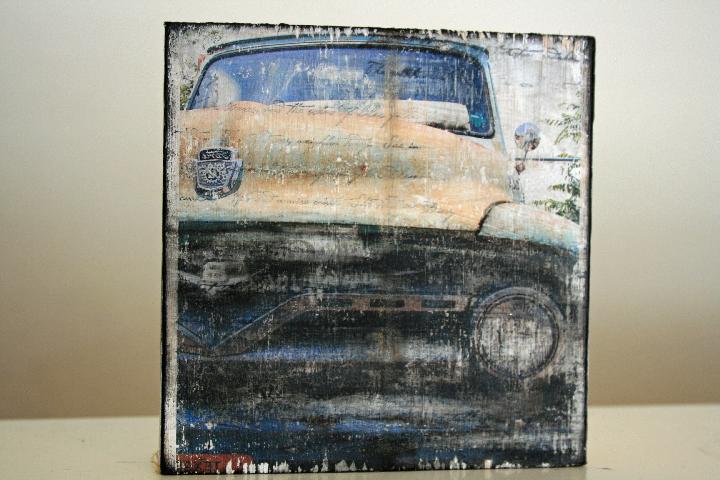
So, a while ago my mom gave me some really nice wood blocks to play with as I wished. They sat in my studio for a long time because, I was just not sure what direction to go in with them. Well, I finally broke them out today. I have used a photo of an old Ford pickup that is in a storage unit right by our house. I loved all of the rust on it so, I took several photos from different directions. I have put it onto the wood block and played around with it after it was onto the wood - blending and oil paint. I am considering giving it to a family member whose name is Ford!

So, a while ago my mom gave me some really nice wood blocks to play with as I wished. They sat in my studio for a long time because, I was just not sure what direction to go in with them. Well, I finally broke them out today. I have used a photo of an old Ford pickup that is in a storage unit right by our house. I loved all of the rust on it so, I took several photos from different directions. I have put it onto the wood block and played around with it after it was onto the wood - blending and oil paint. I am considering giving it to a family member whose name is Ford!
Monday, September 26, 2011
Tranforming "Ugly" fabric for your mixed media project
It is time for a new challenge! When I go to the fabric store and dig through the remnant bin, I often come home with fabric and wonder what was I thinking??? And while I believe that the term ugly is very subjective, I do think that some fabric is more apealing than others. So, for this challenge mom and I are both taking a fabric that we might not be crazy about and altering it to make it something perfect. Since screenprinting is one of my favorite things, I think that I will be using some form of it or maybe not. Sometimes I don't know what direction I will go in.
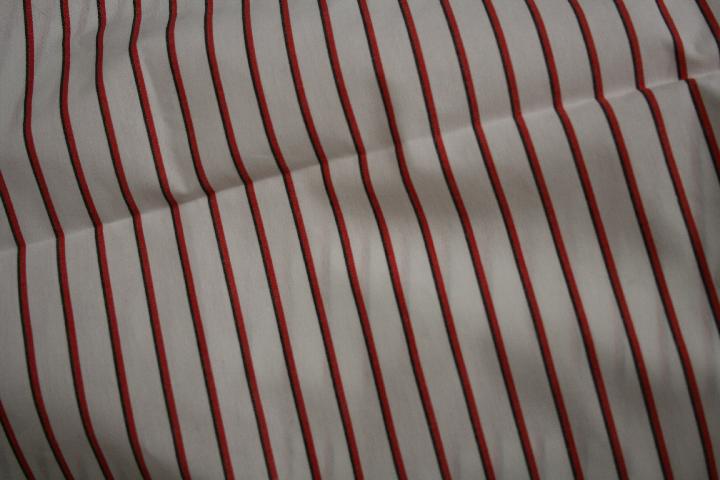
 So here is my "ugly" fabric... It is white with red and black stripes. Can't wait to see how it ends up in the end!
Friday, August 19, 2011
Screenprinting using watercolor crayons and acrylic medium
Whenever I get a request from one of my kiddos I get excited. Alexis has been watching and playing around with me and screenprinting. She asked me to make her a picture for her room. Lately, we have been using watercolor crayons and coloring directly onto the screen which has been fun and forgiving. You can get more than one pull out of the screen but every one is different and unique.
For this little picture, we used a stencil made from contact paper which we placed onto the screen. Then we took a few different colors and drew directly onto the open area of the stencil. Then we laid the screen onto our fabric and pulled the print with acrylic medium. This first picture is what it looked like after it was dry.
 Then I added some free motion quilting and dye ink to bring out the stitching. The little flower top was made using a ruffler foot and then twisting it up to look like a flower. It ended up pretty cute for a little girl's room.


For this little picture, we used a stencil made from contact paper which we placed onto the screen. Then we took a few different colors and drew directly onto the open area of the stencil. Then we laid the screen onto our fabric and pulled the print with acrylic medium. This first picture is what it looked like after it was dry.


Tuesday, August 16, 2011
The Finished Bookcover

I want to go over the last steps that I did for my bookcover. First I couched two fibers together. The first fiber was a plain black cotton and the second was a more decorative multicolor fiber. I used a brown thread to couch them together. I was nervous about doing this process but found it to be quite easy. I had to put my feed dogs down, set the machine to a wide zig zag stitch and leave my foot in the up position. Then I had to hold the fibers from the front and the back to pull it through. Here is a pic of the two fibers together and then couched together.

Next, I was so wanting to try one of the techniques that was in the book ( Edges and Finishes in Machine Embroidery - this is the book I was using for this challenge ) for tassels. The author explains how to take distorted embroidery designs to create interesting tassel tops. I thought this would be a great experiment because I have both an embroidery machine and software. I chose a damask design that was about 4 by 4 inches. I took a pic of it on the computer so you can see it.


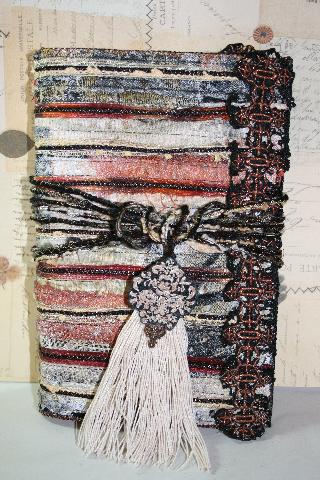
So, here is my finished bookcover. I am happy with the way it turned out and will definitely be incorporating some of these techniques in the future. I have greatly enjoyed going through this book.


Mom has finished her bookcover as well. You can view it at her blog Glenda Bailey's blog.
Tuesday, August 9, 2011
Personalized Nook cover

Monday, August 8, 2011
Finishing up my bookcover background
I am having a lot of fun making this bookcover and all of the techniques that are in the book that we are working out of. I think that when I get a book I dig through it too fast and don't catch all the goodies that can be found inside. I think that is why this challenge is so great because it is encouraging me to go through the book slower.
 Here is my progress so far...
I have decided to lay ribbon and cording over the top of my bookcover to bring all of the colors together. I am stitching over the top using some metallic copper thread in a zig-zag stitch.
 So, here is my zig-zag work. I know, my stitches are not very straight which is highly annoying but, I have decided to leave it because my next step will cover some of this. I have a couching foot which I will DEFINITELY use next time I use this technique.
Here is my next technique which I have fallen in absolute love...

 I have used acrylic, black felt purchased from my local craft store. In my embroidery software, I have created a border using one of the decorative buttonhole stitches on a repeat design. I had never thought of doing this until I saw it in this book. Love it. Oh, and I stitched it in that same metallic copper thread that I used earlier. Then I used my heat gun and melted some of the felt down to create this lacy looking border. Then stitched it onto my bookcover.
My next goal is to make some cording to wrap around and create some kinda closure. Maybe add a tassel. Don't know yet.
You can head on over to mom's blog at Glenda Bailey's Blog to check out her progress. She is about as far along as I am which is funny because I have a tendency to work a lot faster than her. She is making a beautiful lacy bookcover. It will be awesome to see how different ours are in the end.

I have decided to lay ribbon and cording over the top of my bookcover to bring all of the colors together. I am stitching over the top using some metallic copper thread in a zig-zag stitch.

Here is my next technique which I have fallen in absolute love...


My next goal is to make some cording to wrap around and create some kinda closure. Maybe add a tassel. Don't know yet.
You can head on over to mom's blog at Glenda Bailey's Blog to check out her progress. She is about as far along as I am which is funny because I have a tendency to work a lot faster than her. She is making a beautiful lacy bookcover. It will be awesome to see how different ours are in the end.
Wednesday, August 3, 2011
Step 1- Making my background


Monday, August 1, 2011
It is time for a Challenge!

So for a while now, mom and I have been talking about doing little challenges with each other. We thought that with all the books and magazines that we both have, it would be fun to pick a resource and make a project in it. It would be motivation to try new things and to see what directions we both seem to go.
We decided to choose this book about edges and finishes in machine embroidery. It is a really fantastic book with lots of eye candy. I am excited to get started. I am going to post pics of my progress and hope to finish within the two weeks that we have set as a deadline.
Mom is going to do the same so if you are interested in checking out her progress, you can visit her blog at Glenda Bailey's Blog
Subscribe to:
Posts (Atom)